I’ve been in love with Jim Lahey’s cookbook, My Bread and his famous Sullivan Street Bakery in NYC telling many friends and buying them extra copies. Mine’s pretty thrashed, with olive oil finger stains on the cover, dog-eared pages sandwiched with flour sprinkles and lots of lovely loafs eaten by many happy people. With gorgeous pictures and simple, i mean SIMPLE recipes, he mentions that “you don’t need money or anything fancy to bake bread, just hands and an oven.” My favorite part is when he talks about how he used sell them in the streets of NY and what he couldn’t sell, he’d give away saying, “here – try it – it’s good stuff, man”. You just have to love the guy~ (I recommend going out and buying a copy right away!)
Flour + Water + Yeast = Crackly, rustic bread
 Depending on what kind of a bread you want to make and how much patience you have for the dough to rise on its own, you make mods to the recipe, adding more yeast, letting it rise longer etc. And it’s bit of a surprise too sometimes as your rising depends on the weather and your kitchen temperature. Rises faster during summer, slower during winter, you get the picture.
After disappointments of downing some lifeless pizza at California Pizza Kitchen (whom I used to depend on for consistent and quality margarita pizza), I set out to make my own. And it was so good! Crackly thin crust, right amount of chewiness, it was perfect! And it was so satisfying to have demystified what seemed quite the daunting task. Best part?!? It was easy. (Which perhaps I shouldn’t share since //M thinks I spent hours in the kitchen). So – I’m here to share hoping that you’d take a stab too!
(Get your dough ready ~9pm the night before and it’ll be ready to be baked by dinner next day).
Homemade Pizza Dough (inspired by My Bread and tweaked by me):
Ingredients:
bread flour – 450g (~3 cups – if you can invest in a kitchen scale – weighing your dry ingredients is a full-proof way of ensuring consistent recipe)
whole wheat flour – 50g (~3/4 cup – my healthful spin to Jim’s recipe)
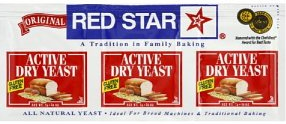
active dry yeast – 7g (~2tsp) (I like the Red Star brand – 3 pack – use a whole pack, no measure needed)
salt – 3/4 tsp (I like to use sea salt because it tastes better to me)
sugar – 3/4 tsp
water (room temp) – 1 1/3 cup
Topping ideas:
fresh mozzarella, basil, sauteed mushrooms, grilled onions, tomatoes, proscuitto, the list goes on…
Dough-Ready:
1) Mix dry ingredients (flours, yeast, salt and sugar) in a medium size bowl.
2) Slowly stir in the water and mix in the dry ingredients until it all comes together. It will look bit dry. That’s ok. The yeast will start eating the sugar from the flour and the sugar and lovely crusty bubbles will rise from the dough.
3) Cover bowl with saran wrap and place a heavy plate on top just so that air doesn’t flow in readily. Let it rest overnight until the next lunch or evening when you’re ready to bake. In total ~ 18 hrs of rising.
4) Dough should be bubbly and fluffy. Cut dough in half, need half for one baking sheet size pizza (serves ~4).
Bake:
1) Pre-heat oven to 500 degrees – yes 500. Very hot!
2) Generously drizzle olive oil across the baking sheet.
3) Using your fingers, pull the dough across the entire baking sheet, flatting it out as thin as possible. It may feel spongy like it wants to retract to the middle. It’s ok to continue pulling it toward the edge of the baking sheet and if you end up tearing it, just mend it together with your hands. Great activity for kids!
4) Toppings – choose your toppings, sprinkling it around the dough until it’s fully covered. I topped my pizza with combo of sauteed onion/mushrooms, mozzarella and pancetta.
5) Bake in the oven for ~15-20 min until it starts to brown and cheese blisters.
Mamma Mia! Bon Appetito~
-ck

